Do you want to learn How to Turn an Image into a Sketch? With GIMP it is really easy to do. GIMP is a photo manipulation software similar to photoshop. It is also considered the best photoshop alternative by many professional designers. If you want to learn more about adobe product alternatives then read this post on “Best Alternatives of Adobe CC“.
It is more lightweight and smaller in size which means that it is faster than photoshop in many regards. If you want to start learning or working with GIMP then we can help! We will be publishing tutorials on GIMP regularly. Follow us and subscribe to our newsletter so that you can stay updated with our latest tutorials.
Today we are going to turn an image into a pencil sketch. This can easily be done just by following 10 simple steps. Let’s get started.
How to turn your image into a sketch
Before you get started, make sure you have the latest version of GIMP installed in your system. It is recommended that you use a high-quality image. It will work on images with lower resolution as well, but for the best result, use images with higher resolution.
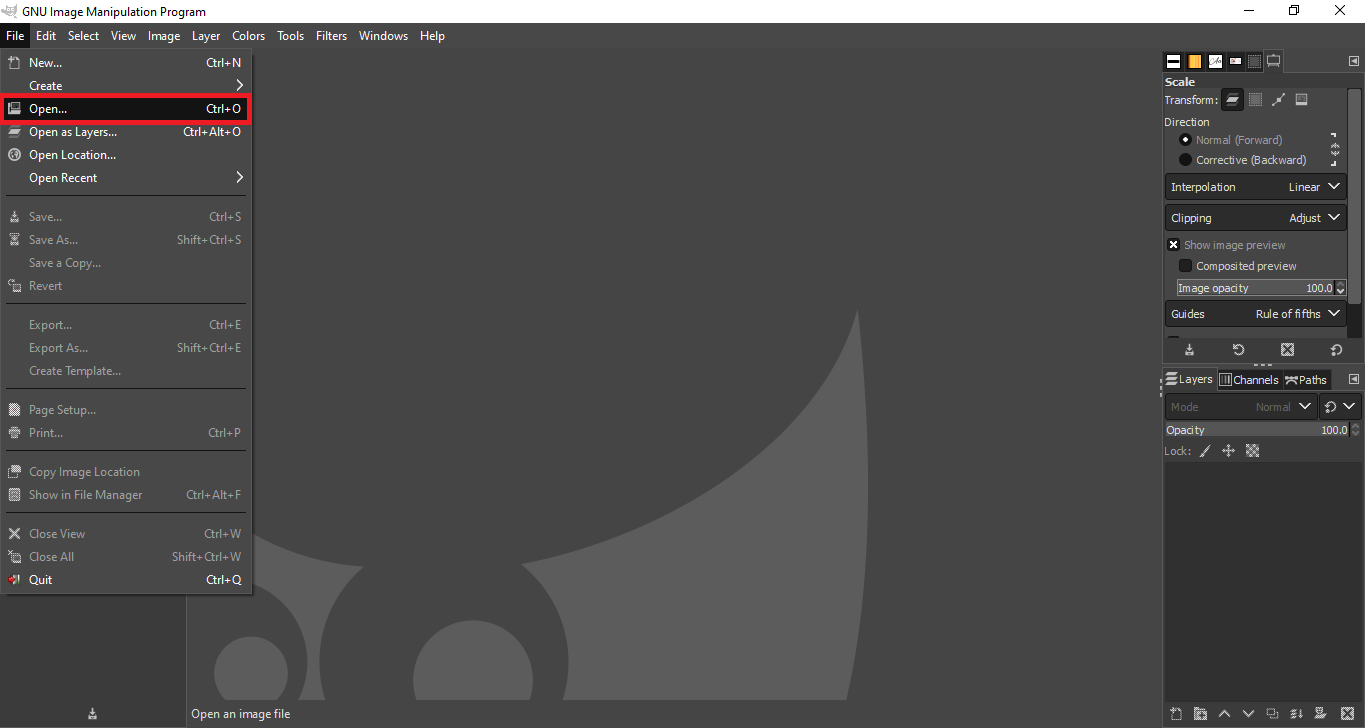
1. Open your image in GIMP
First, open the image that you want to work with. Simply go to File, and select “Open File”. From here browse and select the image. You can also simply drag and drop the image into the GIMP interface.
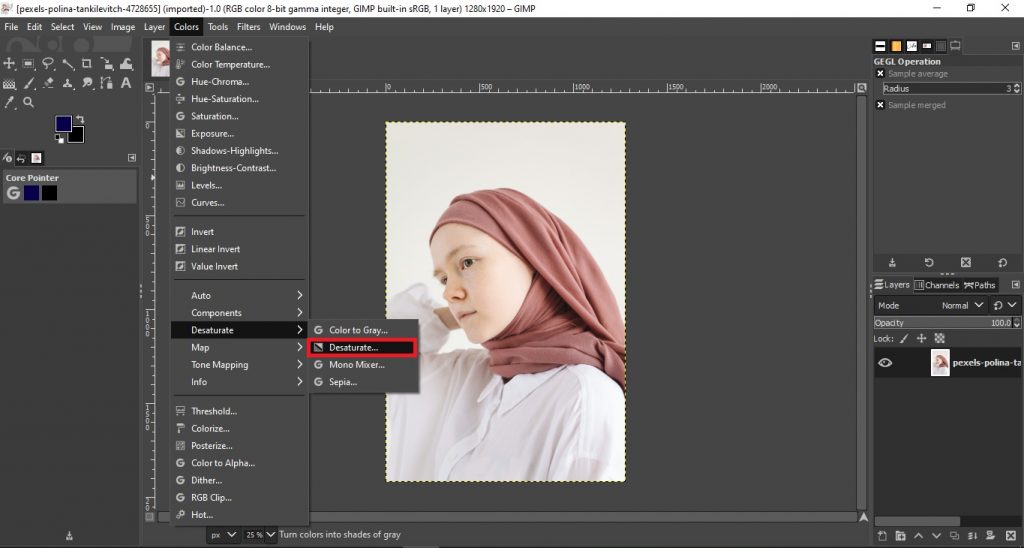
2. Desaturate the Image
The next step is to decolorize the image. In order to do that, go to Colors → Desaturate → Desaturate… here, make sure that mode is set to Luminance
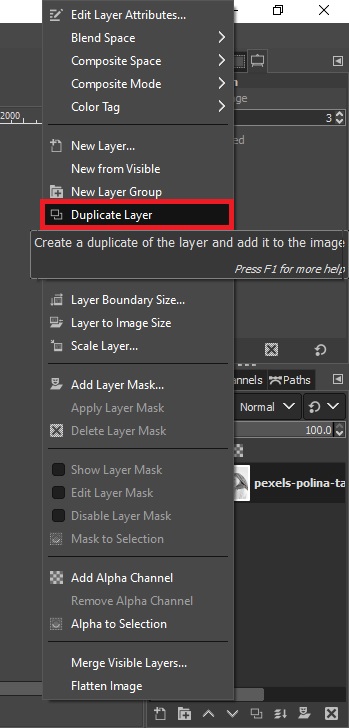
3. Duplicate layer
The next step, duplicate the layer by right-clicking on it and selecting duplicate.
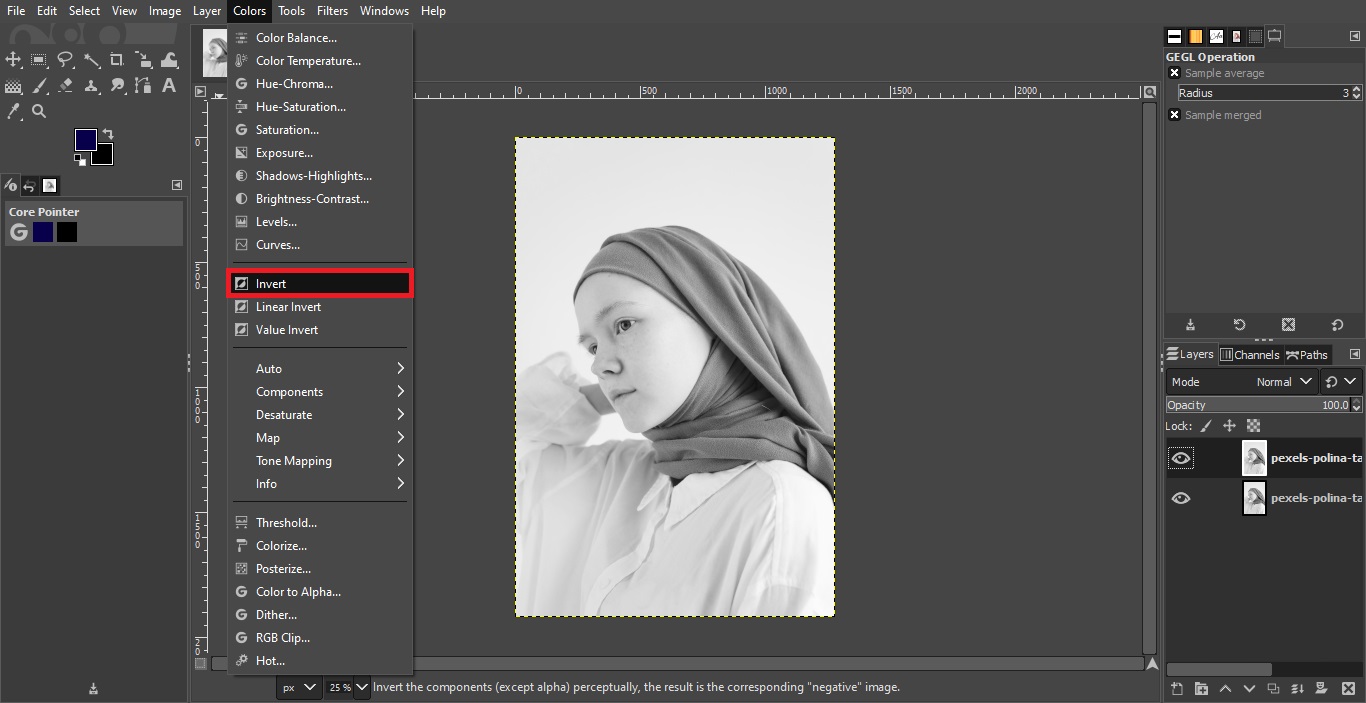
4. Invert Color
Now invert the desaturation. Simply select colors → Invert
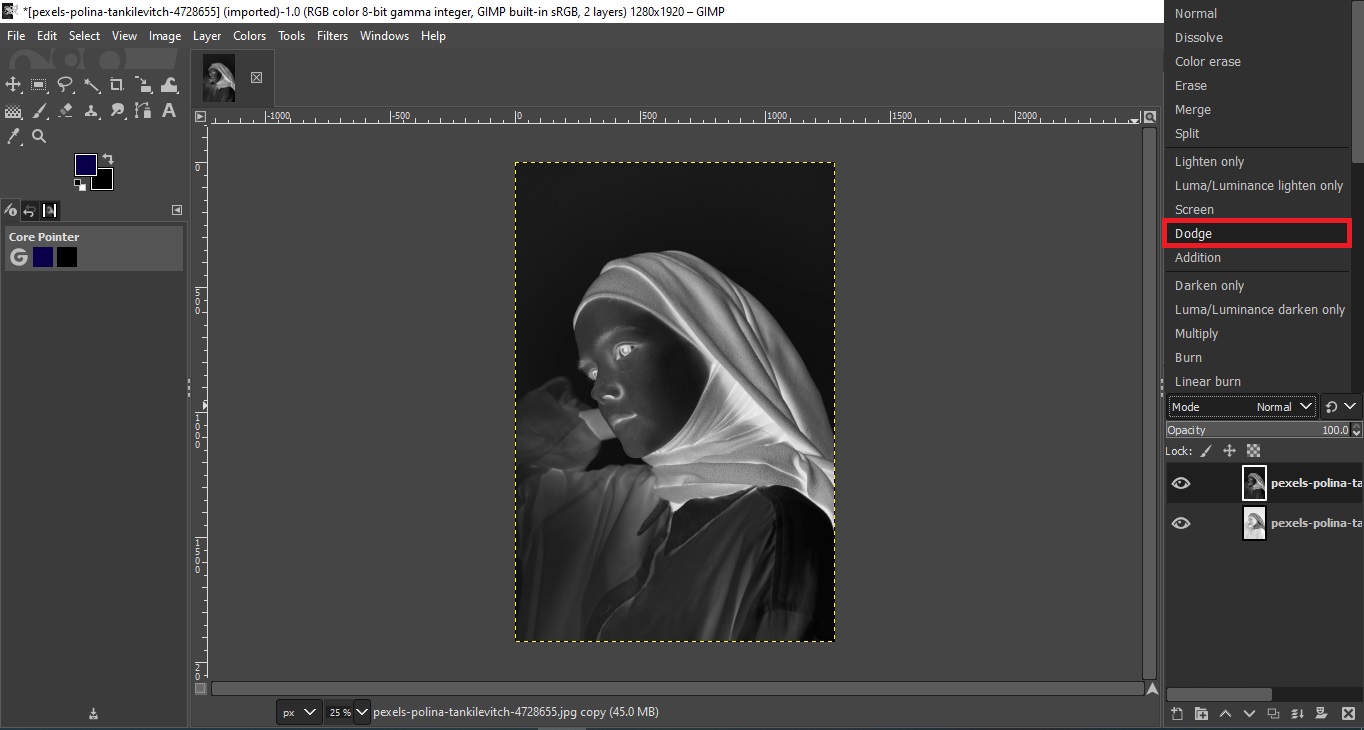
5. Change Blend Mode to Dodge
Then select the duplicate layer and select Blend Mode to ‘Dodge’
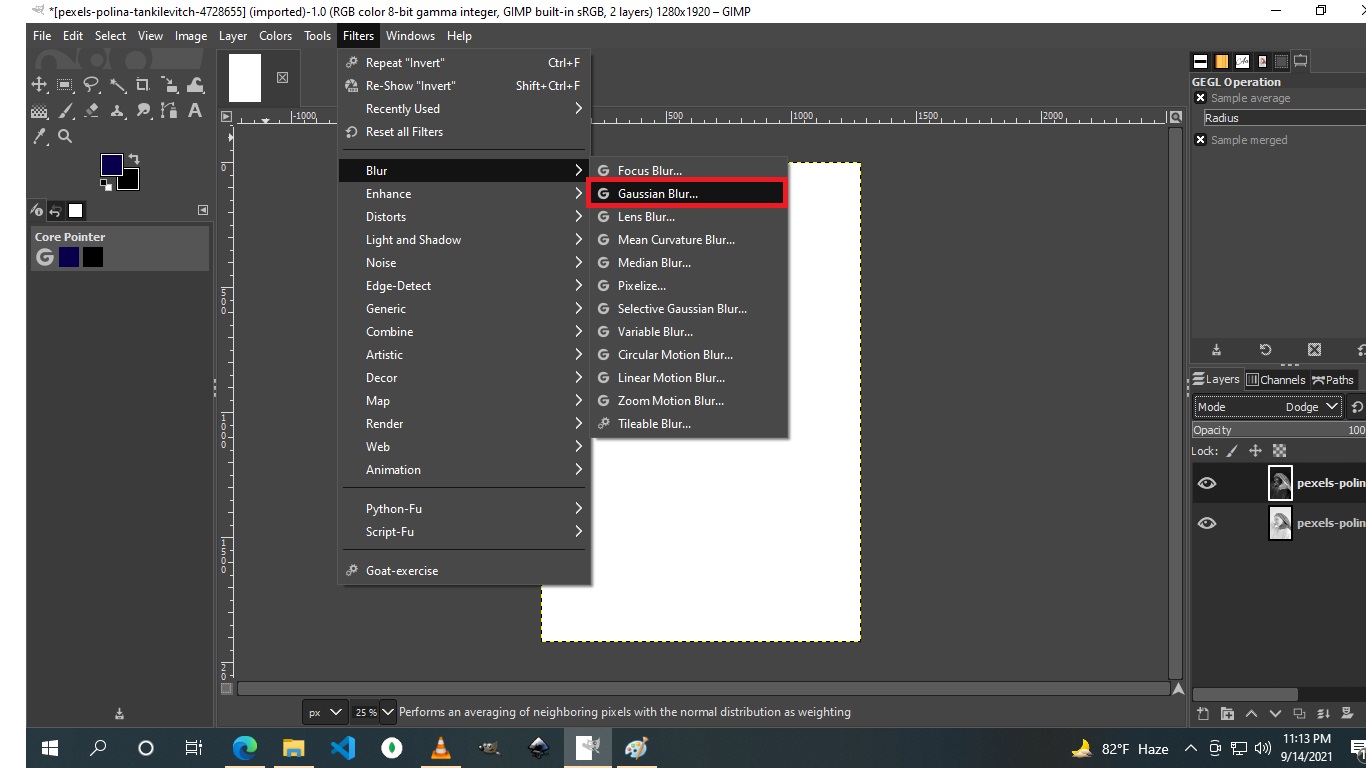
6. Open the Gaussian blur menu
Now go to Filters and hover over Blur, then select Gaussian Blur. This will open up the gaussian blur options where you can tweak the scales to turn the image into a sketch.
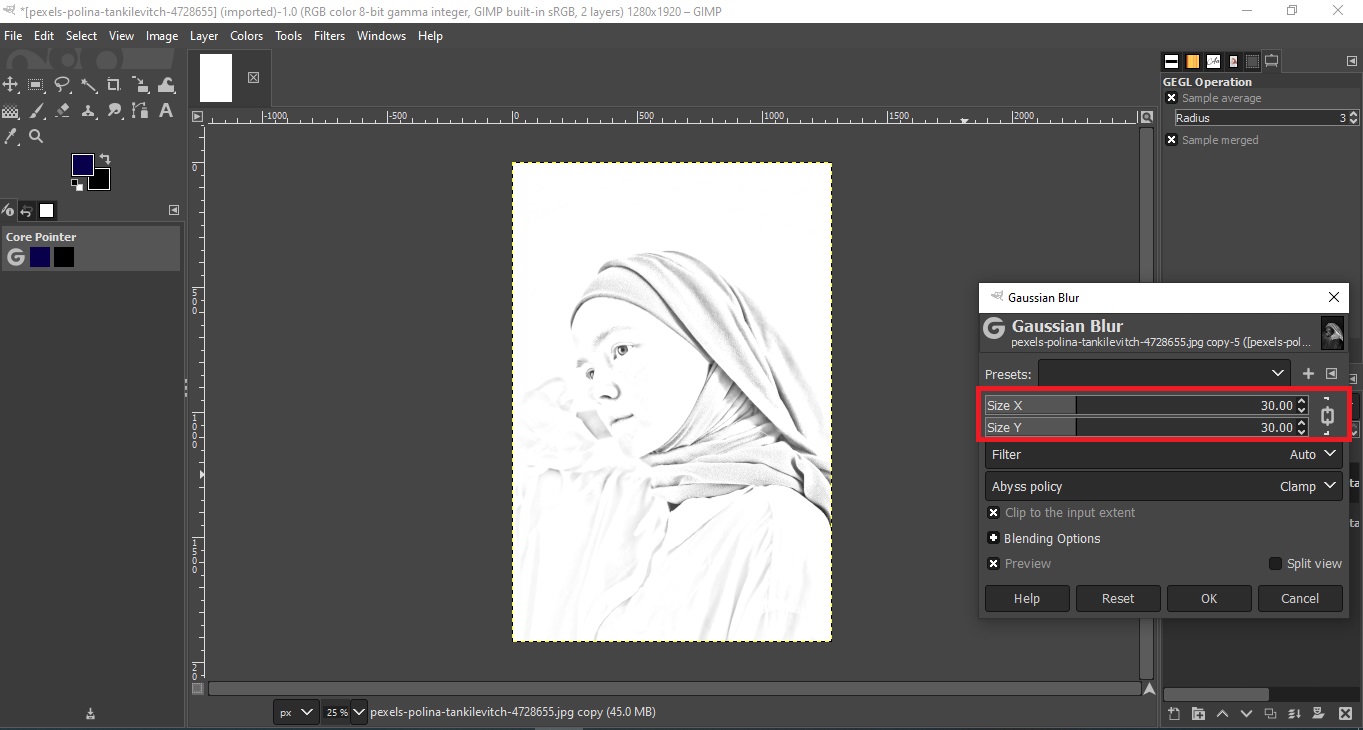
7. Scaling the Gaussian Blur
Change the Size X and Size Y values of Gaussian blur as per your requirement.
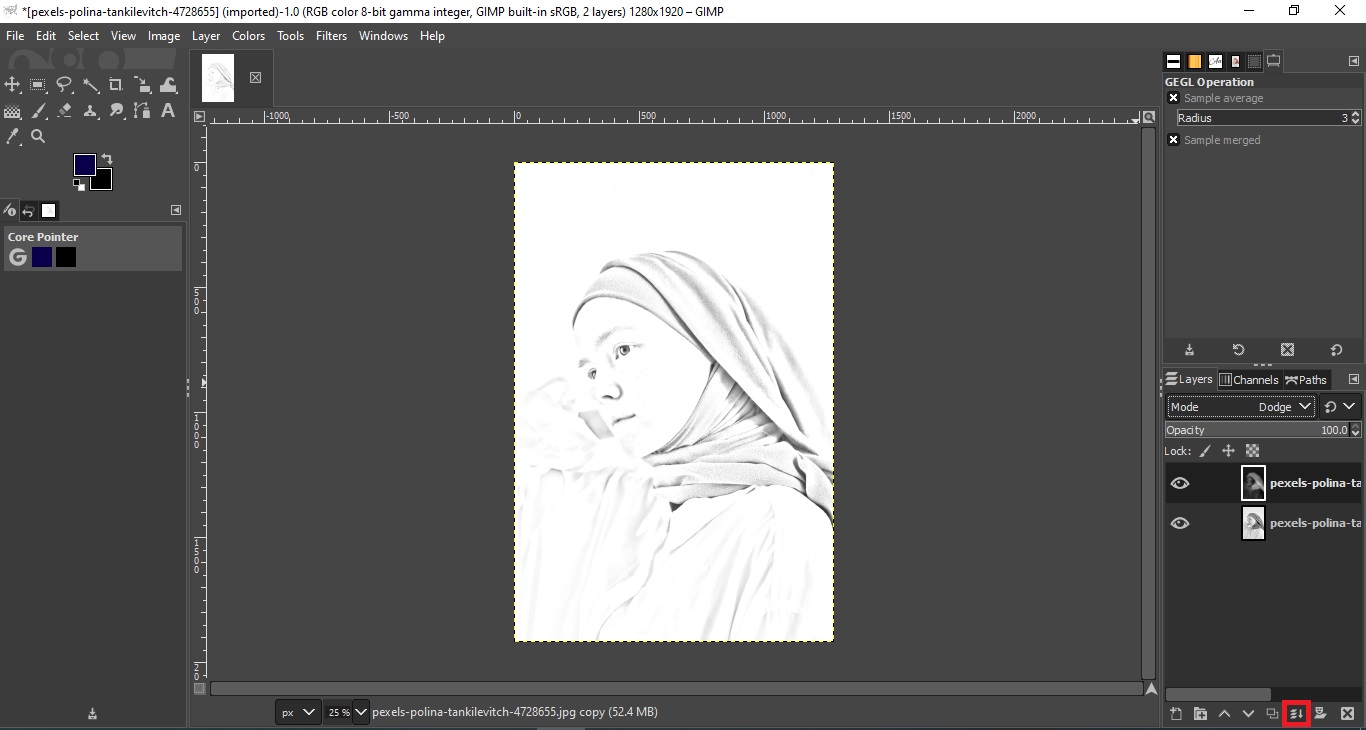
8. Merge both the layers
Since our job is done here, we can now merge both layers. On the bottom of the layer options, select “Merge Below” to merge both layers
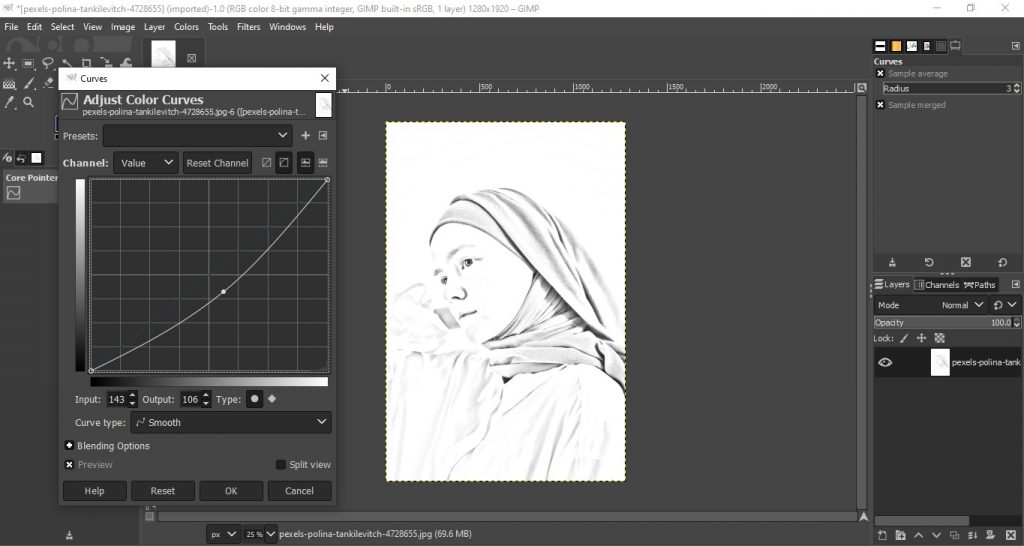
9. Fine-Tuning!
For some final touch up, go to Colors and select Curves to fine-tune the color density until you’re satisfied
10. Export Your Work
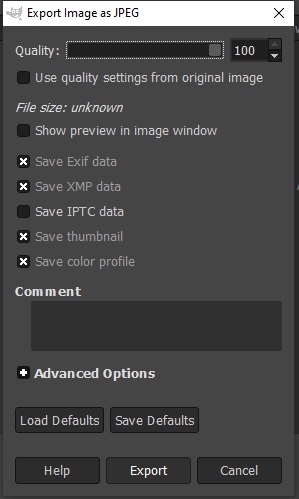
The last thing to do is to Export the image. So go to files and select Export as. Increase the quality to 100% and click ok
And you’re all done! You now have a sketch version of your image. Now if you want to learn more about GIMP you can visit their official site by clicking this link